

After moving your files, it’s essential to update your domain’s DNS settings. This step makes sure visitors are directed to your new host.
DNS changes can take up to 48 hours to fully update. With the right approach, hosting transfer is simple and stress-free. Let’s explore the step-by-step process for a smooth transition.
What Should Check Before Moving Your Website?
A smooth website migration starts with proper preparation. Here’s what you need to check before switching hosting providers.
Backup Your Website
A full backup ensures you don’t lose important files. Save copies of your files, databases, and email accounts. Most hosting offers automated backup tools to make the process easier.
Choose a Reliable New Hosting Provider
Not all hosting providers offer the same features. Compare options based on speed, uptime, security, and support. Make sure the new one supports your site’s software and databases.
Save Login Credentials
Keep all login details for both old and new hosting accounts. You’ll need FTP credentials, database access, and domain settings. Having this information ready prevents migration delays.
Check Email Migration Needs
If your website uses email hosting, ensure your emails transfer correctly. Some hosts provide automated email migration, while others require manual backups.
Check with your provider to avoid losing important messages. A proper hosting transfer checklist minimizes risks and downtime. Double-check everything before moving.
Move Website Files to the New Host

First, you have to transfer website files before migration. There are two main ways to do this: using the hosting panel’s file manager or an FTP client.
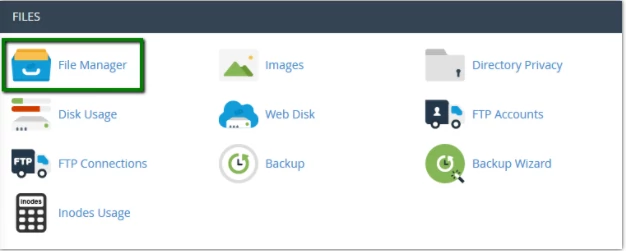
- Using File Manager
Most hosting providers have a built-in file manager. You can upload your website files directly from there.
Simply access the file manager, navigate to the public_html folder, and upload your files. This method is best for smaller websites.
- Using FTP (File Transfer Protocol)
FTP is useful for transferring large websites. Tools like FileZilla help move files efficiently. Connect to your old host, download all website files, and then upload them to the new host.

- Using Migration Plugins (For WordPress)
If you’re moving a WordPress site, migration plugins make the process easier. Plugins like All-in-One WP Migration automate file transfers.
Simply export your website from the old host and import it into the new one. This method ensures no file gets left behind.
Move Your Database From Old to New Host
The next step is to migrate your database. If your site uses WordPress or another CMS, the database stores all content and settings. Here’s how to transfer it properly.
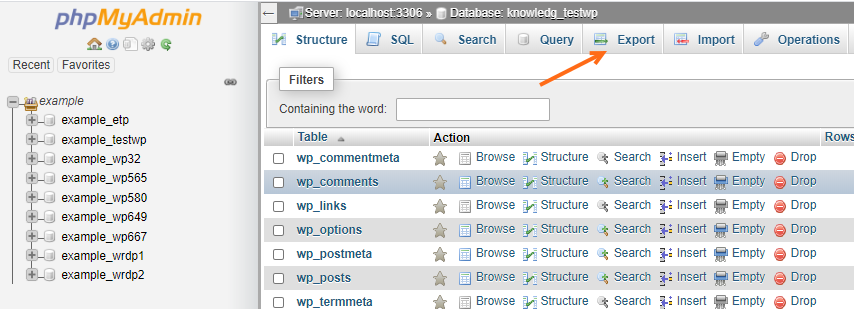
Download the Database from phpMyAdmin
Log into your old hosting account and open phpMyAdmin. Select your website’s database and click Export.
Choose the SQL format and download the file to your computer. This file contains all your website’s data.
Upload the Database to the New Host
Log into the new hosting account and open phpMyAdmin. Click Import and select the SQL file you downloaded.
Then, click Go to upload it. This moves all your website data to the new server. Now, we’re only left with the credentials.
Update Database Credentials
If the database name, username, or password changes, update it in your site settings. For WP, edit the wp-config.php file. Enter the new database details to connect the website site properly.
Update the Domain to Point to the New Host
After moving your website files and database, update your domain settings. This step connects your domain to the new hosting provider.
- Log in to Your Domain Registrar
Go to the website where you bought your domain. This could be GoDaddy, Namecheap, or another registrar. Use your credentials to log in.
- Find the Nameserver Settings
Locate the DNS Settings or Nameserver Settings section. You’ll see the current nameservers linked to your old host.
- Change the Nameservers
Replace the old nameservers with the new hosting provider’s nameservers. You can find these in your new host’s control panel or welcome email.
- Save and Wait for Propagation
Click Save to apply the changes. It may take a few hours to 48 hours for the update to take full effect. During this time, some visitors may see the old site.
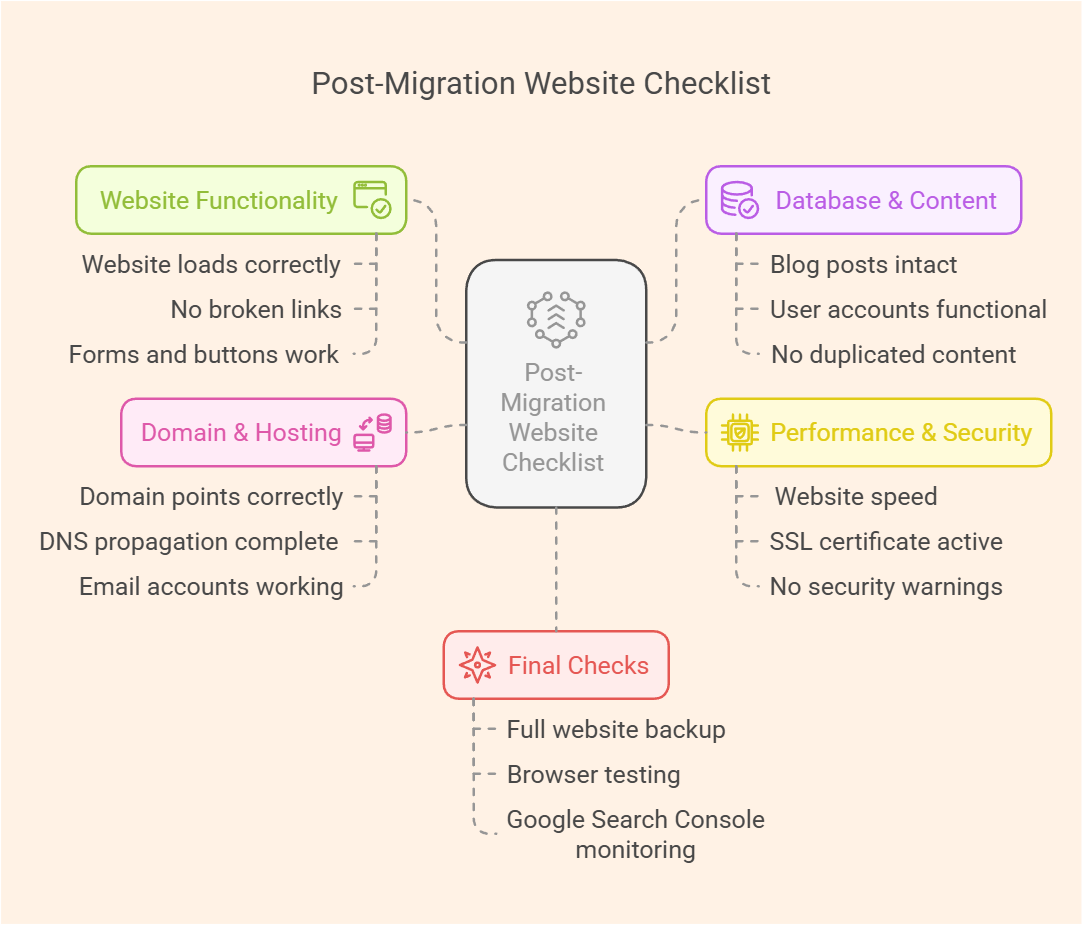
Test Your Website After Migration
Once you move your website, test everything to ensure smooth performance. Checking for errors early prevents downtime and broken pages.
Check Website Loading
Open your website on a desktop and mobile device. Ensure it loads fast and displays correctly on all screens. A slow or broken site may indicate migration issues.
Test Images and Links
Click through different pages and check if images appear properly. Click on links to confirm they direct visitors to the correct pages. Broken links can frustrate users and affect SEO.
Verify Forms and Emails
Test your contact forms, sign-up forms, and email notifications. Ensure messages are sent and received without issues. Some hosting providers require email reconfiguration after migration.
Look for Errors
Check for 404 errors, missing pages, or database connection issues. If something is broken, revisit the migration steps to fix missing files or incorrect database settings.

Conclusion
It’s easy to move a website if you follow the right steps. A smooth migration means no downtime and your site is running properly.
Once the website migration is complete, you’ll enjoy better speed, security, and performance. Always double-check your files, database, and domain settings before finalizing the move.
Choosing a reliable host makes all the difference in performance. Bluehost, SiteGround, and HostGator offer excellent hosting transfer success to make migration stress-free.
If you haven’t picked a host yet, consider one of these options. Now that your website move is finished, focus on growing your business with confidence!